
Bending measurement mould:
During the firing of ceramic bodies at high temperature, a molten phase is created in the body that connects other particles and the penetration of this molten phase into the pores causes shrinkage. On the other hand, this molten phase helps the solid particles to slide on each other and at the same time causes it to change shape under the gravitational force of the part in addition to contraction. Shrinkage and deformation due to gravity are inevitable changes during the firing of porcelain bodies. The characteristics of the molten phase, mainly its amount and fluidity, determine the extent of manageable shrinkage and sagging. Since it is not possible for us to measure these features, the banding mold can determine their result and in fact the body’s firing resistance, which we will check in the following steps.
- Cast a well-deflocculated slip into the banding mold which its characteristics are suitable for the production of tableware by the slip casting method.
- Allow the casting process to complete well to create a heavier base of sample.
- Take the sample out of the mold only when you are sure of its stability and you are sure that it will not change shape after leaving the mold.
- Dry the sample gently and completely. Prepare at least 4 pieces in this way.
- Place the piece similar to the figure below on the top, bottom, left and right of the kiln and do the firing process. There is no need to biscuit firing for this test.
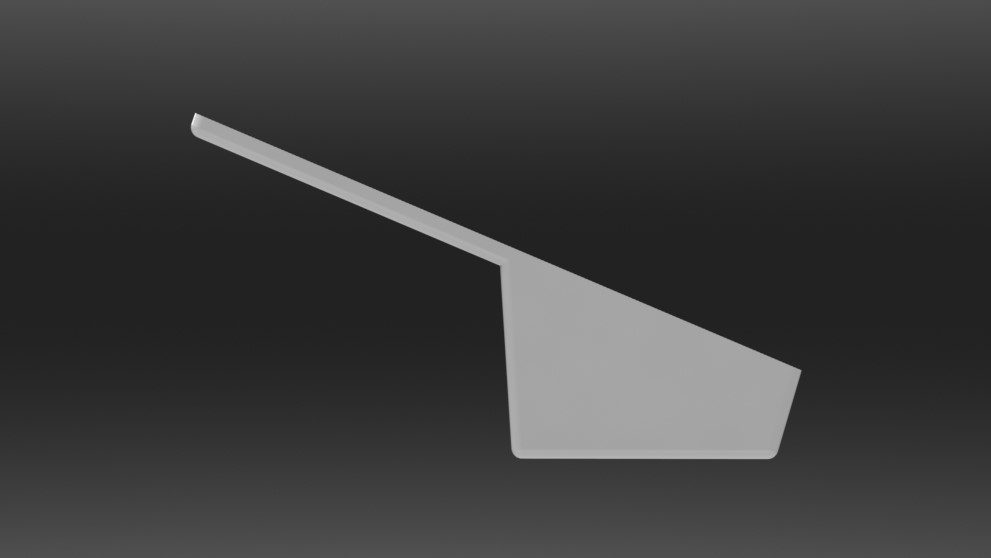
6. During firing, a molten phase is created and causes the blade to bend towards the ground. After leaving the kiln, three possible states are possible. Either the blade is completely horizontal, or it does not reach the horizon, or it is bent more than the horizon. The figure below shows the possible states.

7. A body is suitable for porcelain firing, which becomes completely horizontal after firing (middle figure). In other words, the composition of the body and the firing temperature are suitable for the production of porcelain dishes. The same body will drop at a higher temperature.
Measuring melting characteristics of glaze
- 1) To measure the amount of glaze melting, two molds are provided to you. A base mold and a glaze button mold that has three holes.
- 2) First, cast a large amount from the base mold and dry the parts.
- 3) Cast the glaze slip into all three holes of the button mold and let the entire volume be filled with the casted slip.
- 4) After some time, remove the three glaze button molds from the mold and dry them completely.
- 5) After drying, weigh them. By grinding from a larger surface, bring them to a weight of 10 grams.
- 6) Place the buttons, which are now 10 grams, from the side of the smaller surface on top of the slide as shown below. It is better to stick the button to the surface of the base piece with an adhesive so that it does not come off during movement
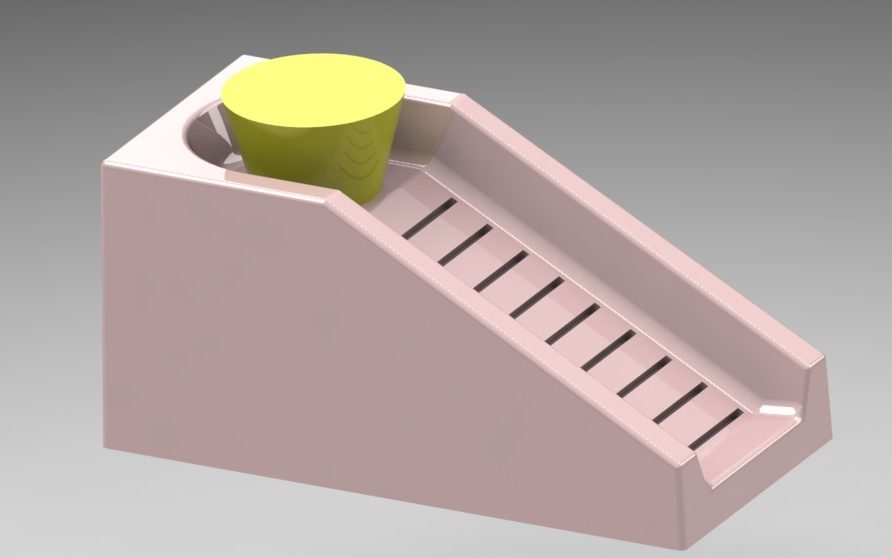
- 7) During firing, the glaze melts and flows down the sloping surface. If the melting of the glaze is too high, it will come off the sloped surface and stick to your refractory plate. To prevent this from happening, be sure to put a piece of biscuit under the sample so that the melted glaze will stick to it if it leaves the inclined surface.
- 8) Place the samples in different parts of the kiln, top and bottom, left and right, and start the firing process.
- 9) A perfect melting glaze is a glaze that slides down to the last three lines but does not leave the sloping surface.
- 10) After leaving the sample from the kiln, check whether the glaze has cracks or not. If you see a crack, you should also worry about the coefficient of thermal expansion of the glaze.